
Yandex.Direct is the Russian paid search equivalent of Google Ads and given the differences between Yandex’s “discovery” options, and Google’s broadening scope of content discoverability methods, paid search for many brands can be a great route in driving traffic and leads/sales.
The first step is to create a Yandex.Direct account.
Registering An Account
First of all, register a new mailbox in Yandex, go to the main page of Yandex.Direct and click on the “Start advertising” button.
After that, you will be transferred to a page on which you will be asked to enter an email address, as well as indicate the country and currency of the advertising campaign.
You do not have to specify an e-mail address – it is needed if you want to receive various informational materials from Yandex. If you are not interested, you can leave the field blank. But the choice of country and currency must be approached carefully! Please note that they are indicated only once and in the future they cannot be changed.
What further actions you have probably guessed by now – we accept the terms of the data processing agreement and click the “Start using the service” button. So far, everything is simple.
Choosing Ad Type
The type of advertising campaign depends on the place where the ads are displayed and the settings that you can set. There are 7 types of advertising campaigns in Yandex.Direct:
- Text and image ads – work in search and YAN;
- Display campaign – works only in YAN;
- Advertising of mobile applications – works only on mobile devices;
- Smart banners – work only in Yandex advertising networks;
- Search banner
- Dynamic ads – work only in search;
- Display campaign on the Yandex home page.
In 99% of cases, you will use text and image ads, as this type of advertising is suitable for most products and services. You can always configure other types of advertising later.
To start setting up, just click on the “Create Campaign” button:

Creating & Setting Up A Campaign
In this step, you need to fill out some general information about your advertising campaign:
Ad Title
The name will only be visible to the administrator of the advertising account (that is, to you). Your customers will not see the name. Therefore, you can specify it in any form – the main thing is that it is convenient for you to navigate when there are several campaigns in your account.
Ad Delivery Schedule
If you have a temporary promotion that will take place at a certain time, it makes sense to indicate the start and end dates of the campaign. In other cases, you can leave the start date as the current day, and do not fill out the end date at all.
Next, let’s figure out which time targeting to choose.
Many advertisers intentionally turn off ad serving after hours, but in practice, this is not always an effective solution. In practice, the time it takes a client to contact a company often does not coincide with the time it took to view an advertisement.
Therefore, we recommend that you leave the default targeting settings at the start of the campaign, that is, around the clock, including weekends and holidays. This will give you the opportunity to determine the most effective ad serving time.
The main thing is that during non-working hours your site has the opportunity to leave a request or somehow contact you in another way.
Please note that if you want to show ads 24/7, you do not need to check the box next to “Take into account holidays”:
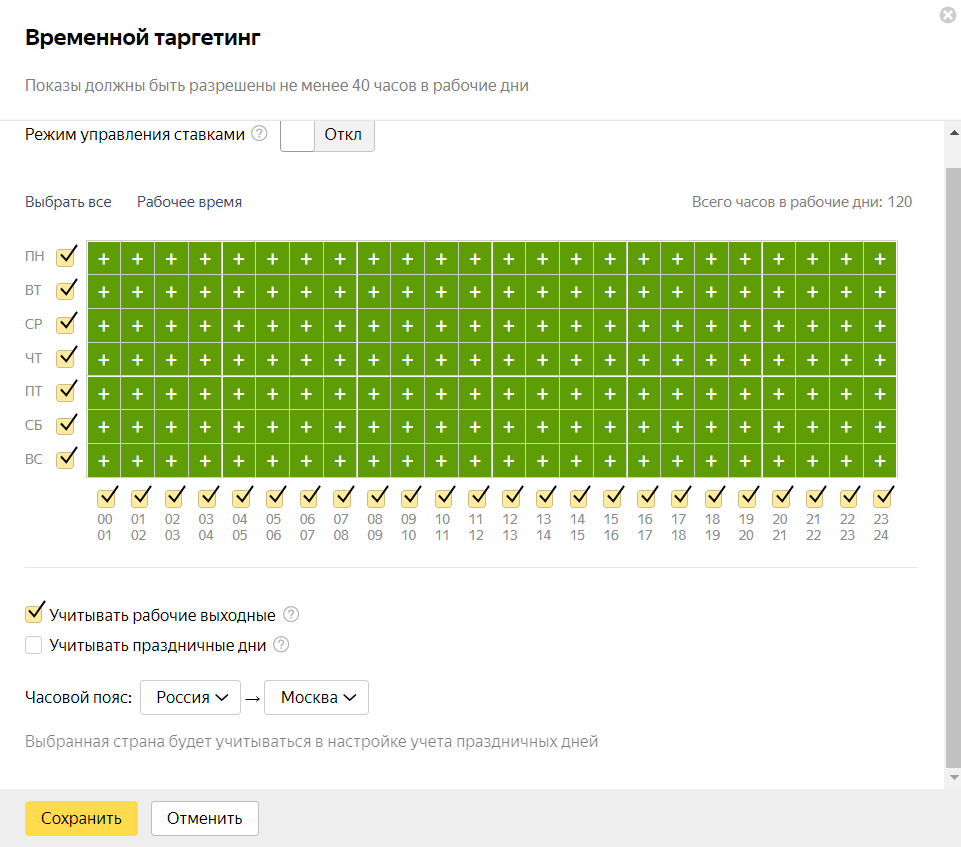
You can also enable bid management mode in the time targeting settings. With it, you can increase or decrease bids per click on an ad at a specific time of the day.
However, at the start, we do not recommend using this setting. First, you need to test the effectiveness of advertising. In the future, depending on the results of the campaign, the temporary targeting settings can be adjusted.
Geotargeting Your Ads
Everything is simple here – select the region you need from the list. We also recommend that you select the “Advanced geographical targeting” checkbox. This will allow you to show ads on requests containing the name of the region, even to those users who are physically located at the time of viewing the advertisement elsewhere. What does it mean:
For example, you want to appear in a search for “real estate agency”.
The display region is “Moscow”. In this case:
- “real estate agency,” you will see only those users who at the time of the search are in Moscow.
- “real estate agency in Moscow” you can also find users from other regions.
Bid Management
There are several bid management strategies in Yandex.Direct. For the first campaign, we recommend choosing “manual bid management with optimization”. Since we are currently setting up search advertising, we also recommend that you select “search only” ad settings:
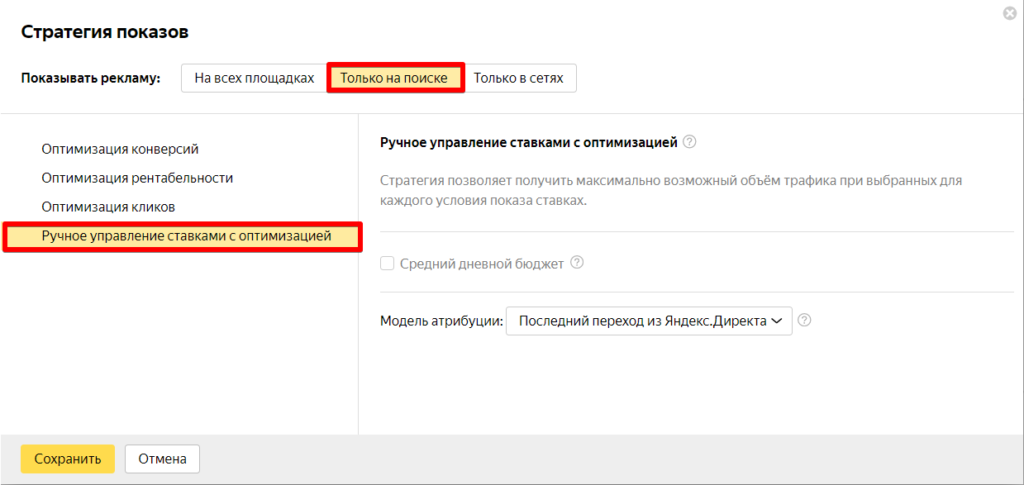
In the future, when you more or less test the effectiveness of search advertising, it will be possible to connect impressions on the networks.
Please note that you can set an average daily budget for an advertising campaign. If your budget isn’t enough for all-day impressions, ads will be less likely to participate in the auction. During the week, the budget is redistributed: the remaining budget from less active days will be spent on more active ones.
Thus, daily consumption may be greater or less than the specified value.
In addition, no more than 30% of the indicated amount of the average daily budget can be spent. At the same time, daily consumption per week on average will remain within the specified limit.
If you set a limit on your average daily budget, you can also specify a delivery mode for it:
- Standard – ads will be shown whenever possible;
- Distributed – Yandex.Direct will systematically display ads throughout the day so that the average daily budget is spent gradually.
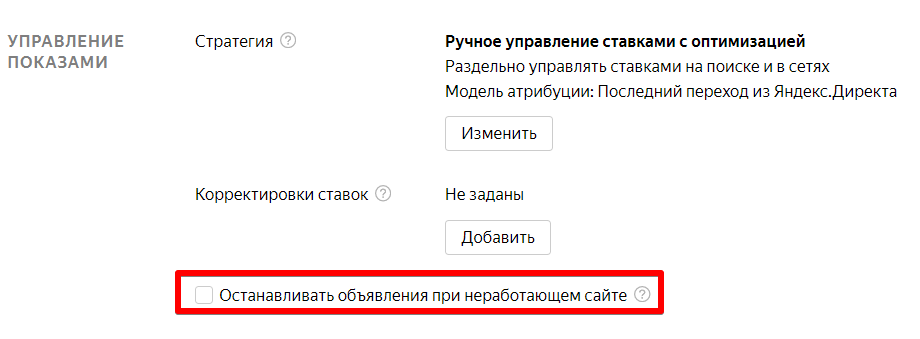
Important! In the “Manage impressions” section, be sure to check the box next to “Stop ads when the site is down.” This will save the budget if for some reason your resource is unavailable.
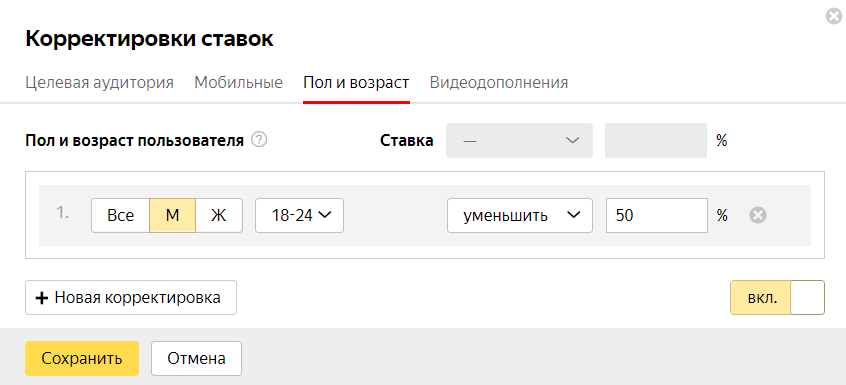
Bid Adjustments
Here you can increase or decrease the maximum price that you are willing to pay per click on an ad for a specific segment of your audience.
For example, you can reduce the bid per click by 50% for men between the ages of 18 and 24.
“Business Card”
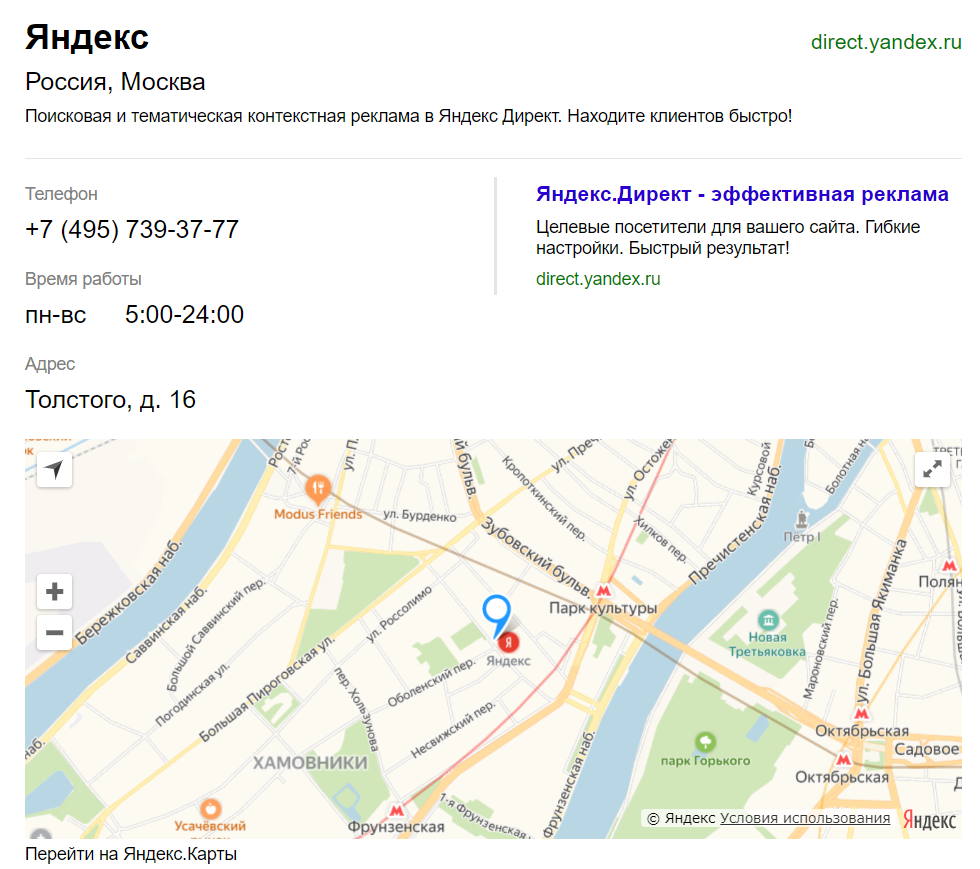
Next, we recommend connecting a business card and filling out all the contact details of your company. After that, the link “Contact information” will appear in the body of the announcement, which will lead to a separate page with your contacts:

And here is a separate page with a business card:
Connecting a business card is absolutely free, but it will give you several additional advantages:
- The ad will become more informative;
- If you do not have a website, a business card can serve as a landing page;
- If you have a connected business card For users of mobile devices, the “Call” button or a button with a contact phone number will appear in the ad, when clicked, users can instantly contact you.
- Your ad will also appear on Yandex.Maps.
For a click on the “Contact Information” link in the body of the ad, the same amount of money is debited as for a click on the ad itself.
Ad Metrics
The metric counter allows you to track the effectiveness of the advertising campaign: see the number of clicks on the ad, their conversion, user behavior on the site, etc.
Also, be sure to leave a checkmark next to “Mark links for the Metric”. If this setting is enabled, a unique identifier of the type “? Yclid = 123456” will appear next to each link. This will track every click on an ad. Just pre-check if your site gives an error using a link like “https: // your-site /? Yclid = 123456”.
In addition to Yandex.Metrica, you can connect other statistics counters to the campaign: Openstat and LiveInternet. However, this is not necessary.
Dialogues
If you connect dialogues, from time to time the “Online Consultant” button will be displayed in the ad:
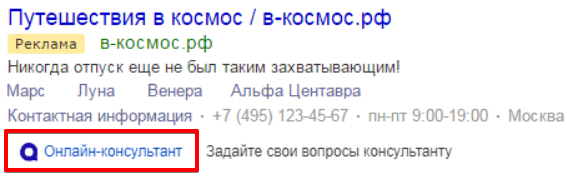
By clicking on this button, the user will be able to immediately write to the manager, without going to the site. This will significantly reduce the client’s path to completing the targeted action and increase the conversion rate of ads.
Notifications
You can receive notifications about the status of your company by e-mail or SMS. For example, that you have run out of funds, or the ads are moderated. This service is provided free of charge.
Other Settings
- Prohibit impressions on certain sites of the Yandex advertising network. Since we are setting up search advertising, for now, this setting will not be useful to us.
- Indicate negative phrases, that is, queries and words for which you do not want to appear in the search. For example, if you advertise kitchen furniture, you can add the negative keyword “-ad.” Thanks to this, you will not get into impressions by the name of the series “Hell’s Kitchen”. However, we don’t recommend setting negative keywords at the campaign level. It’s better to add them in the next step when you create ad groups.
- Let Yandex collect additional relevant phrases for your ads for which they can appear in the search. For a new campaign, and especially for beginners, we recommend disabling this setting, as phrases are compiled automatically and in practice may turn out to be completely “not relevant”. This setting needs to be tested and best of all with a specialist. Without it, the campaign will also work correctly.
- Specify the number of ad groups per campaign page. This setting does not affect anything and you can specify as many ads as it will be convenient for you to view. Optimally – no more than 20, since on slower computers with a larger number of pages will take a long time to load.
- Block impressions for users with a specific IP. For example, if you do not want to show ads to your employees.
- Disable the substitution of part of the text in the header. What does this mean: if the second heading is not filled in your ad, Yandex can take it from the ad text or from the site address. With this option enabled, the title will not be substituted. Nevertheless, we recommend that you disable this setting, but carefully fill out all the headers manually.
- Enable the display of data from Yandex.Directory when showing ads on Yandex.Maps and in the Insert box. We recommend including it here, as this will make the announcement more informative due to the availability of photos, reviews and company ratings from the Directory.
- Do not take into account automatically stopped competitors’ ads when placing bids. In this paragraph, for the first campaign, it is better to uncheck the box.
- Add the campaign to the most important. A list of the most important campaigns can be used to visually separate campaigns. If this is your first campaign, you can leave the box unchecked.
Now you can click the “Next” button at the bottom of the page. This is the first step in setting up the campaign. The next step is to set up your ads.